

Staveley Town Lock and Hartington Harbour
Staveley Town Lock was a new lock (no. 5A). It was neeeded because the mineral railway line 300 metres east was lower than when the canal was last operational, so the canal had to be dropped to get under it.

Staveley Town Lock is at the bottom left, just above the basin. Hartington Harbour is where the boat is pictured between the two road bridges.
Plan courtesy Derbyshire County Council.
The initial work on the lock, laying the base pad and building Staveley Town Bridge (no. 12A), were done as part of the construction of Staveley Town Basin in 2011. Click here to see the story of this work.
The design work for the lock has been done by engineers from Derbyshire County Council, which owns the site and the canal.

One of DCC’s drawings.

This is a map of the area in 1892. There was no Staveley Town Basin and the railway line was new.

19th February 2010. The site a year before construction of the basin had started.

June 6th 2011. The first concrete was poured for the base of the lock.

June 9th 2011. The next lot arrived.

June 13th 2011. There’s more.

June 24th 2011. One side of the bridge was poured.

June 30th 2011. The bridge deck was being prepared.

July 10th 2011. The WRGies started the lock forebay.

This is what it was like when they had finished.
The syphon pipe will lead off the gap on the left of the entrance wall.
Note that the contractors had finished the bridge deck.

December 19th 2011. The contractors inserted stop planks.
Note the clay bund just in front of the lock.

January 7th 2012. The basin had been flooded but the bund kept the water away.

July 29th 2012. The bund leaked …..

….. which required the lock to be pumped out.
Since the flooding of the basin in January 2012, not much had been done on the site, because our Work Party were building the abutments for Constitution Hill Bridge.

June 30th 2013. Our Work Party started on the lock at our Festival.

August 11th 2013. Work continued.

August 18th 2013. The first day of the Waterway Recovery Group camp.

The foundations for a washwall had been dug out.

August 22nd 2013. Lots had been done already in the lock.

One group was building the entrance to the lock.

The concrete was poured for the washwall foundations.

August 27th 2013. They had started to lay blocks on the washwall.

September 8th 2013. Our Work Party was concentrating on the inner walls of the lock. The outer walls were built by the WRGies. The gaps between the walls, where the steelwork is sticking up, will be filled with concrete.
The recess in the left inner wall is for the lock ladder; the recess further back is for the bottom lock gate.

September 8th 2013. We had a second WRGie camp and they continued with the waswall.

December 9th 2013. We had our first big pour of concrete.
For the full story, click here.

We filled the two outer chambers, the lock itself is in the middle.

Altogether 98 cubic metres was poured. It took a long time which meant a floodlit Work Party.

December 22nd 2013. Our Work Party had to pump lots of water away before starting work. For the full story, click here.

February 23rd 2014. The inside lock walls were being faced in brick.

April 8th 2014. Concrete pour for the wing wall apron. For the full story, click here.

April 17th 2014. The offside wing wall shuttering was ready for concrete …..

….. whilst towpath side steelwork was being erected.

May 27th 2014. The bridge wing walls were done. Contractors were putting in a diversionary path along the canal bed so that they could put in the nearside wall by the towpath.

June 10th 2014. There was a flood following massive rainfall.

July 29th 2014. The Work Party had started to build the walls below the lock.

To build the curve, they had to slice the blocks into wedges.

They kept the offcuts to fill in when doing the counter curve at the other end.

August 13th 2014. This was Week 2 of an incredible Waterway Recovery Group Camp. Click here for the full story.

September 1st 2014. The brickwork for the towpath below the bridge was complete. Eventually, there would be coping stones on top.

The groove was for the stop planks.

September 22nd 2014. Work continued at a rapid pace.

The towpath comes under the bridge and goes round the corner.

Looking under the bridge, you can see the last three steps.

Note that the rebar steelwork was narrower here. That was because the next bit of wall would be narrower, only 1m thick. The final section was about 600mm.

October 5th 2014. This view from the bridge showed the quadrant really well.

A close up of the curved quadrant wall.

This shows the recesses which would house the bottom gates when they are open.

October 27th 2014. The inside blockwork was up to full height.

The n-shaped reinforcing bars were ready for the next concrete pour. Unlike previous pours (see below), there would not be an outer block wall; instead wooden shuttering was used. This would happen when the brickwork was complete.

This view shows that some blocks had been laid on end to be anchors for when the concrete is poured.

November 19th 2014. The latest addition to the Work Party’s kit – Denis the Digger.

We bought Denis thanks to a very generous donation from one of our supporters.
To see a video of it being unloaded, click here.

January 18th 2015. A lovely winter’s day. Denis the Digger was in action.

Here was our heroic volunteer Work Party, whom we must thank for doing all this building.
March 2nd 2015. The brickwork on the offside lock wall was complete.

Our block layers had also been cracking on with the offside washwall below the lock.

April 25th 2015. The next phase, leading on to Eckington Road Bridge began.
Firstly, all this spoil had to be removed. This meant that Denis the Digger …..

….. and Benford the Dumper had a huge job. (Above two photos by David Kiddy)

The brickwork on the lock walls was now complete. Note the WRGies who had come to help this weekend.
Yes, they were shrink wrapped blocks on the left. They were to support the shuttering for the next concrete pour.

May 15th 2015. The brickwork on the offside wall below the lock was almost complete.

The winding hole was being dug out with the kind help of Colin and Tina Hobbs from the Waterway Recovery Group.
The weir and spillway would be on the right, just this side of the bridge, where you can see the loop in the towpath.

June 12th 2015. This view from the top of Mount Staveley showed the compound, the concrete pump ready to pour (click here) and some extra equipment that had been brought in for the Waterway Recovery Group training weekend.

The brickwork on the offside wall was finished – note the stop plank groove.

The view inside the lock. Once the water was in, only the brickwork would be visible.

July 28th 2015. Another Waterway Recovery Group Camp. You could see how much more muck had been removed from the winding hole. (The lock is top left – this was taken from Eckington Road Bridge.)

This is under Eckington Road Bridge. The little yellow mark would be the water level. The concrete pad beyond was poured last night. The WRGies would build a block wall here.

These L-shaped blocks would go all along the right hand side in the top photo as a retaining wall to hold the towpath in place. A block wall would be laid on them and the gap filled with concrete.

This hole had been dug by the onsite contractors. It was visible top left in the photo three above. The spilll weir would be here.

Some of the WRGies were putting in the shuttering for the final concrete pour on the lock.

Meanwhile, the contractors were digging a hole for the foundations for the upper wing walls.

July 31st 2015. Only three days since the set of photos above was taken, but lots had happened.
The WRGies had started to build the latest block washwall.

Much of the last pour of concrete on the lock offside had been done. Only the coping stones remained to be laid.
The pipes were for the bywash, which would be installed by the contractors.

The contractors had cast the foundations for the bridge towpath side top wingwall.

This was the offside paddle culvert. The paddle gear would go above the top hole. It would connect to a paddle that would cover the hole in the recess. When raised, this would let water go through to fill the lock. The water would come out into the lock via the hole that you can just see on the bottom left. The top lock gate would be resting against the shoulder on the left.

August 4th 2015. Things were moving apace, even from a few days ago (see above).
The foundations for the washwall backing up to the Loop Road Bridge were poured yesterday.

Dave and Dave supervised the installation of the first L-shaped retainer.

Under Eckington Road Bridge, the original canal wall had been exposed …..

….. as had the floor of the canal.

August 6th 2015. The contractors had started work on the spill weir.

This was the track to the top of Mount Staveley.

The contractors were making a new pad to hold our containers (seen in the background), because they needed to dig where they were presently located in order to install the bywash.

Dr Geraint Coles came to see the remains of the original (1770s) Eckington Road Bridge.
We had a dig to find out more. Click here for the story.

August 7th 2015. The Waterway Recovery Group finished their second week-long camp. What an incredible job they had done. Amongst other work, they had laid 2040 blocks in this washwall.

The onsite contrators had poured the foundations for the offside, upper wing wall for the tailbridge.

The rest of the concrete for the offside lock wall had been poured. All that remained was for the coping stones to be fitted.

August 9th 2015. The latest find was the towpath going under the mineral line railway bridge.

It would have been at the bottom left corner of this photo.

August 16th 2015. Mike Patterson brought his drone and got some amazing shots.
This was the lock.

This was the new winding hole. Note all the L-shaped pieces in the middle.

These will all go along the towpath side of the winding hole.
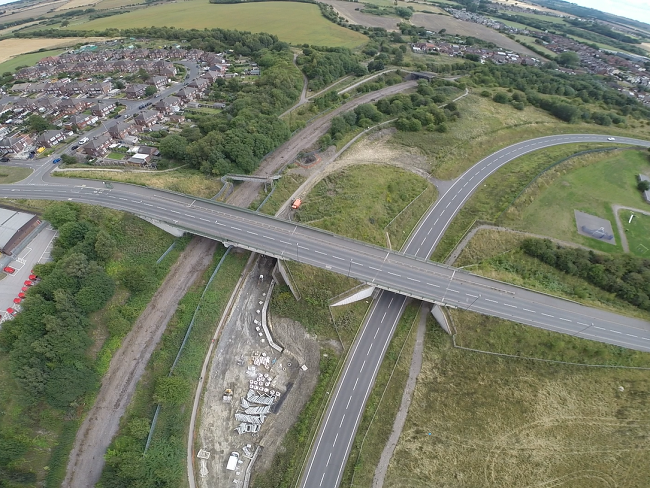
This showed the way ahead. The orange fencing top centre is the start of the railway bridge – see above.

August 17th 2015. The onsite contractors had been installing the twin 750 mm pipes that would carry the bywash.

This was the top end.

The above photo was of the hole on the top right. There wwould be a bend to get the pipes to the bywash inlet in the lock mouth wall.

August 23rd 2015. A concrete pad had been laid, bottom right.

This was to take the first few of 91 L-shaped sections to act as retainers for the towpath. Denis (the Digger) was lowering one into position, guided by Ralph, Phil and Dave.
You can see a video of the next section being fitted by clicking here.
Later, a block wall wiould be laid on the horizontal parts and the gap filled with concrete.

September 4th 2015. Denis the Digger was being serviced by an engineer from T.C.Harrison JCB. We are very grateful to them for offering this invaluable support.

Meanwhile, the contractors were installing more of the pipes for the bywash. As you can see, they had installed a chamber at the angle.

They would soon reach the outfall at the lock forebay.

This was another chamber at the bottom end.The bywash will empty out via the gap in the washwall.

They had also started to prepare for the upper wingwalls for the bridge …..

….. and for the base of the spill weir.

September 15th 2015. The contractors were doing the first concrete pour for the upper offside wing wall. As there was not a lot needed, they did not order a pump, they used a hopper instead.

The upper joint chamber for the bywash had had channels inserted.

They were setting up the chamber for the intake to the bywash from the lock forebay.

The lower bywash chamber was done, but not yet connected to the outfall back into the canal.

The base of the spill weir had been cast.

September 24th 2015. The contractors were putting the waterproof paint on the concrete laid so far for the upper wing walls.

Our Work Party were up to the top level of blocks at Hartington Harbour, which would be just below water level, so the walls were being finished in brick.

October 2nd 2015. This view from Mount Staveley showed the tailbridge. Eventually, it would be clad in brick.

The contractors were preparing for the final concrete pour on the towpath side upper wingwall.

The steelwork was a real work of art.

A pair of 4½ ton blocks that were lowered into place this morning. They were for the bywash outflow …..

….. as you can see on the left.

Our volunteers had installed some more L-shaped reinforcing panels, pinning them to the foundations with metal rods set in epoxy resin and had laid the first course of blocks …..

….. so it was now time to pour the concrete for the next section of foundations.

5th October 2015. In two days, sixteen more L-shaped units had been installed and pinned, including a bend; that’s all those to the left of the red writing. An incredible feat.

October 22nd 2015. Amazing progress had been made with the walls on the towpath side of Hartington Harbour – the winding (turning) hole below the lock.

The block wall, built on the L-shaped pieces was shooting up.

The gap would be filled with concrete. Note the ties at the back, built into the block wall.

The offside wall near the Loop Road bridge was almost finished, just the coping stones to be fitted.

The upper wingwalls for the tailbridge, built by the contractors, were complete.

They had also cast the top of the lower bywash inspection chamber …..

….. and had connected the chamber up to the outfall pipes.

They had also cast the top of the upper bywash inspection chamber (top centre) and were working on the bywash inflow (bottom right).

November 10th 2015. Guys from Hargreaves Lock Gates were installing the quoins.

These were the curved corner pieces that hold the gates in place.

Originally made from carved stone, these are cast iron and bolted in using resin and stainless steel bolts. The quoins at Dixon’s Lock, built in 1994/5 have the same sort of quoins.
Today the contractors were putting a mortar grout down the hole behind them. Eventually there will be a block of carved stone covering them.

At the bottom lay a cup. When the gates were fitted, they had pins on the bottom which fitted into these cups. (Photo by Dave France)

They were fitted yesterday with help from Denis. (Photo by Dave Kiddy)

Before they finished, Hargreaves also fitted ladders in the corners of the basin.

This was the inflow for the bywash that had been built by the contractors working for Derbyshire County Council.

Before they left, they put channels into the top bend.

This was the bywash outlet (left of photo). Fred Cameron built the arch.

November 12th 2015. The concrete pour for the footings by the towpath, that had been postponed because of foul weather, finally took place.

There was no chance of taking a truck down into the canal (as seen further down), so it had to be pumped from the Loop Road.

Denis (the Digger) was holding up the pipe. Note the reinforcing bar (rebar) in the trench.

After each batch, Dave France tamped it down to ensure that it was dead level. The yellow V points to a steel bar that he had driven into the bank at the exact height. He had checked these levels, and those of the shuttering, endlessly with Nev the Lev (see further down).

There is lots of joking around whilst waiting between loads, but when the pumping restarts, everyone just gets on with it.
To see a video of this, click here.

When the trench was full, there was a bit of concrete left so they poured it between the L-shaped reinforcers and the block wall.

Note the ties and rebar that make sure that it all holds together.

November 15th 2015. More of the L-shaped units were being installed. Note the two volunteers in the background.

Adrian was not asleep, he was drilling holes – a bone-shaking job.

Denis the Digger got a clean up from Ken and Dave. (Photo by Dave France)

Meanwhile, Fred’s arch over the bywash outlet was finished. What a great job.

These are the ladders in the basin installed by Hargreaves, see above.

The following morning (16th). 22 units had been installed since Thursday’s pour of the concrete footings (see below). All those to the left of the end of the block wall.

November 13th 2015. Today the Work Party fitted 12 of the L-shaped units, including 2 bends. Note that to fit them on a bend means that the unit has to be cut with a stone saw. Just look at the size of them! (Photo by Dave France)

They started to the left of the red writing.
There were 23 units to go to get to the spill weir; all in a straight line. Then another 10 units to get under Eckington Road Bridge (which is to the right) and 25 units below the lock.

December 23rd 2015. The recent vile weather had made conditions worse than ever at Hartington Harbour.

Fred Cameron had been fitting the blockwork into the steelwork of Eckington Road Bridge. He had been carrying the blocks one by one through the ankle deep mud.

Meanwhile the bywash intake was looking good. Note the grooves for the stop planks.

This was the stop plank holder. Concrete lintels would go on top of the blockwork and the whole thing would then be encased in concrete because it is loadbearing. Note the reinforcing bars at the bottom.

See how well the new steps fitted into the curve of the wall.
Please note that there would be full disabled access round the bridge. This section will be too steep for a ramp.

January 24th 2016. Clearing out the slab for the spill weir.

The spill weir is on the left. Our volunteers would build a block wall to join up with the L-shaped reinforcers that they had installed all the way back to Eckington Road Bridge (see above.)

The opening for the stop plank holder is on the left. On the right, are some steps.

January 27th 2016. The steps had been finished. (Photo by Dave France)

February 4th 2016. A load of blocks were delivered for the spill weir. A block wall would be built on the right. Note Ken and Mick laying blocks. Fred was laying bricks right in the distance by Eckington Road Bridge.

Meanwhile Dave was fitting a drain at the top of his steps.

February 7th 2016. Mick and Andy were laying blocks …..

….. as was Helen, with Ken who had gone for this shot.

Mandy and Adrian were mixing mortar for four lots of people laying blocks.

Meanwhile, Dave and Ralph had started on the spill weir wall.

February 13th 2016. This was the spill weir at Hartington Harbour. You’ll need to concentrate for the next bit.

The spill weir is the grey bit.
These drawings were photographed in the snap cabin (volunteer welfare facilities) and are working drawings, so we apologise for the presentation.

This is a plan at base level. The canal is at the bottom. The hatched grey bits will be block walls. The gap in the middle is for a culvert in case the canal has to be emptied because this will be the lowest part of this section. The recess will hold a paddle, which will be raised to let the water out, just like lock paddles. The front infill will be concrete, as shown, but the back infill will be hardcore, not concrete. The water will go over the weir into the back chamber and out through the sump chamber, i.e. a pipe that will take it to a drain that leads back to the River Rother.

This is a front view from the canal. You can see the culvert to drain the canal. In normal conditions, the water will drain out under the towpath, which is at the top. This is carried over the weir by precast concrete culverts which will be fitted on top of the block walls. There will be wooden weir boards that can be adjusted to get exact water levels.

This is a plan at towpath level. You can see where the weir boards will slot in. The front wall, into which they slot, will be higher than the wall behind. You can see the 600mm outlet drain at the top.

March 6th 2016. Fred had almost finished off his beautifully neat sloping wall. See how many bricks had to be cut.

Type 1 agggregate was used to fill the space between the two inner walls of the spill weir.

March 10th 2016. We were joined by a 65 tonne machine today.

It was there to fit the culverts for the spill weir.

It was a tight fit getting under the Loop Road bridge. One of the reasons for having such a big machine was that the arm had to be low to get under the bridge. With a 7 tonne load, Denis would have cantilevered over.

Click here to see a video of the third unit being lowered into position. All smiles when it was in place.

Eventually, the towpath would go over the culverts. All the bank carrying the current towpath on the right would go. The water that runs over the weir will go down a ditch on the right into a settling pond and eventually back into the River Rother.

Earlier in the week, the lintels were laid across the top of the stop plank holder. This would eventually be cast in concrete because it is load bearing, hence the reinforcing mesh.

The covers for the bywash inspection chambers were cast in the summer, but were finally fitted by the big machine yesterday. This was the top one …..

….. and this is the bottom one.

March 20th 2016. A glorious day and a very good turnout. There were at least five people working elsewhere when this shot was taken.

Lots of blocks and bricks were being laid. Fred had got on amazingly with the brick lining to the sump chamber. Dave was laying bricks along the towpath side blockwork and Terry, Helen, Walter and Mick were laying blocks. All these people had to be supported by others making and transporting the mortar, doing the pointing etc.

The stop plank holder had been shuttered ready for concrete tomorrow.

This manhole cover is all that can be seen of the huge bywash inspection cover (see above).

March 21st 2016. Our volunteer Work Party had a new piece of equipment today. It was a concrete hopper.

Concrete was poured into it from the delivery wagon …..

….. Denis then swung it over to the required position …..

….. where it was emptied by pulling on the rope.

The foundations for the link wall were then poured. Denis had scooped the concrete out of Rex, the dumper in the background.

More concrete was poured into the front wall of the spill weir. Click here to see a video of this process.

They were using the left over concrete to fill the gap between the L-shaped reinforcers and the block wall. Graham was scraping out the last little bit.

This is the outside of the stop plank holder. The concrete was poured here as well. The reinforcing in the above photo was to ensure that it did not collapse with the weight of concrete.

March 25th 2016. A builder was knocking down some houses just up the road. He wanted to get rid of the hardcore; we needed some hardcore, so we helped each other.

Denis came and sorted it out.

Meanwhile, Fred was getting on amazingly with brick lining the sump chamber of the spill weir.

March 28th 2016. The builder was still bringing hardcore.

The bridge sides had been protected by wooden panels.

George had sealed up the syphon pipe exit – which he built four years ago. Yes, the syphon pipe idea had been scrapped, but was four years later was revived!

March 30th 2016. Some of the Waterway Recovery Group volunteers have been cutting wedges out of blocks …..

….. for George to put in his wall to create the curve. He had used 34 so far, but needed another 42 to finish.
The Waterway Recovery Group guys finished at the end of the week. As ever, we were really grateful for the work that they had put in on this camp.

April 3rd 2016. The other side of the bridge had been sorted out.

Dave was installing land drains. The green pipe would feed excess water into the canal.

The space behind the ex-syphon pipe inlet had been concreted up.

The minimum order is 4 m3, so the excess had been used to fill behind some of the Hartington Harbour walls.

George’s curved wall was up to height. The rest would be done in brick.

April 14th 2016. The footings for the next set of L-shaped retainers had been poured.

The coping stones had arrived. This huge one had a curve cut out. This was because to fit the quoin for the lock gate.

You can see the recess where a paddle would go. Officially this is called the Penstock Valve. It is used should the canal need to be drained. Note also the curved wall on the left.

April 17th 2016. Another L-shaped retainer was being fitted. Note Adrian on the towpath in the little dumper returning from delivering mortar to Fred and Mick working on the spill weir, which is on the other side of the Loop Road Bridge.

Whilst the retainer was being lowered into position, Paul and Bromley were preparing for the concrete pour for the last of the footings.

Mike Patterson came yesterday (April 16th) with his drone and took these two shots. You can clearly see the retainers ready to go in. On the bottom left, you can see the spill weir. Don’t panic, it is the wide-angle lens that makes it appear to be a parallelogram.

In this shot you can see Hartington Harbour which is between the bridges. The canal goes under the right hand section of the left hand bridge in the distance. This is Eckington Road Bridge. On the top right you can see a gap between the houses. This is where the bungalow was that is now the hardcore under the tailbridge.

April 18th 2016. As promised, the next (and last) section of footings in this section had been poured.

As had the middle of the spill weir above the sluice. Note that the brickwork had almost been finished.

April 20th 2016. The last 13 L-shaped retainers in this section.

This was the spill weir from the Loop Road Bridge.
Now that was is nearing completion, one could see how it works. Eventually the towpath would go on top of the culverts and the present path (at the back) would be dug away. Under normal conditions excess water will go through the culverts into the sump chamber at the back. There is a drain hole here through which the water will run via a buried pipe into a settling pond and eventually back into the River Rother. At times of flooding, excess water will spill out of the back of the sump chamber, between the brick sections, and run down the channel at the back, along the hedgeline, into a settling pond. The hole at the bottom of the wall will have a paddle in front of it to block it shut. This will be raised if there is a need to drain this whole section of canal. The water will go through a tunnel under the wall to the sump chamber at the back.

April 22nd 2016. The first coping stone had been installed.

May 1st 2016. Some of the coping stones had been laid on the offside of the lock.

Fred had just finished off the brickwork at the spill weir – 4000 bricks.

May 5th 2016. The guys from Hargreaves Lock Gates were on site installing the lock gates.
 This was the bottom towpath side gate. (Photo by Dave France)

This was the top gate. (Photo by Dave France)

Here the balance beam had been put in place, but was not yet secure. The L-shaped piece of metal on the left had to be slotted into the L-shaped groove on the top right of the gate and held in place using bolts.

This was the collar that holds the gate in place and the anchors that hold the collar in place.

A rod would go down the hole connecting to a paddle in the recess below.

This was the paddle. When you want to let water into the lock, you wind the paddle up and water rushes through …..

….. and comes out into the lock via the hole at the bottom. You can see photos of this under construction further down.

Usually, lock gates have a pin at the bottom that pivots in a cup on the lock bed. These are different.

When the cup is part of a plate attached like this, it is called a spigot.

In this photo, you can see the paddles on the bottom gates. To let the water out of the lock they are just wound up. The gate on the left had the paddle open, on the right it was closed.
The beautiful wood that goes red when wet is an African hard wood called Ekki, click here for more information.

These were the stop planks. They go into the slots above and below the lock to stop the water getting in when maintenance has to be carried out.

Eventually they will be stored in the stop plank holder in the left wing wall, but we have to get a gate made and fitted first.

The gates were paid for with a grant from the Veolia Environmental Trust. Click here for the story.
Cllr Dean Collins (Derbyshire County Council Cabinet Member for Highways, Tansport and Infrastructure), Malcolm Marshall (Board Member of Veolia Environmental Trust) and Selwyn Jones, DCC Engineer, were there to publicise the occasion.

Finally our heroic volunteers joined in as well. They are Stewart, Ralph, Malcolm, Ken, Bromley and Walter; Dave in the digger. Mick, Fred and Nathan were hard at work elsewhere.

May 8th 2016. A fabulous day and a fabulous new, shiny bit of equipment for Malcolm and Ralph to use. We had bought a stone grab of our own. It is bigger and stronger than the one that we were hiring and cost about a month’s hire. Given all the coping stones in Hartington Harbour, it turned out to be invaluable.

Meanwhile, down in Hartington Harbour, Fred had been cracking on with the brickwork.

May 13th 2016. The odd shaped coping stones were in place. They fitted the curve superbly.

We needed this rebate so that when the gate is shut, it has something strong to rest against. There will be the pressure of thousands of tons of water behind it. Note the concrete on the right with the hole for the paddle rod. This had £24 worth of dye added to the top layer to blend it in with the stonework. You can see in the background that almost all the rest of the coping stones for the lock had now been delivered.

May 16th 2016. Most of the coping stones were in now. Malcolm had been doing the flaunching. That’s the mortar backing that you could see next to him.

May 19th 2016. There were at least five new developments in this photo. Offside paddle gear fitted. Lock ladders fitted. Cill fitted (that’s the wooden block bolted to the bottom of the lock up against which the gate abuts). Grill fitted in front of water intake. Aggregate spread.

This grill was to stop big bits of rubbish being washed through the paddle gear.

The lock ladders were very smart, as were the coping stones round them. Note the pipes at the top left.

These were land drains being fitted by Malcolm.

May 20th 2016. Hardly the most stunning of photos, but this represented the amazing efforts being put in by our Work Party in order to get the lock open for our Festival. This is puddling clay from Nuneaton that was delivered at 4.30 a.m. (yes 04.30) this morning.

This is the rest of the clay (200 tons total) that had been delivered. Note the two short lengths of pipe.

The works were not yet finished, indeed there was years of work still to be done. Therefore the decision had been taken to flood the lock and this section just for the two days of the Festival. Thereafter, the water would be drained away and work would resume.
To flood this section a bund (dam) would be installed just in front of the Loop Road Bridge. The two sections of pipe shown above would be set very carefully into the bund to let waste water from the lock drain away. The bywash would be boarded up, so the only water would be from the lock. The access section on the right would also have a bund.

This was the bottom cill. The gates butt up against these huge beams. The triangular gap would be filled with concrete.

May 21st 2016. Staveley Lower Basin had been cleared out. (Photo by Dave France)

May 22nd 2016. Adrian was patting down the bund just before the Loop Road Bridge.

Note that there was now clay around the bottom stop plank on the bywash. When the water was let in, some of the stop planks would be removed and it will go through the bywash to avoid the lock being filled with clay being washed through. Also note that the brickwork had been restored above the land drain pipe in the bywash bay.

May 23rd 2016. Hargreaves installed six mooring rings at the basin.

May 24th 2016. This is the photo many of us had thought would not come to pass – certainly not before our Festival. Four boats in the basin and the dam open. However, we must not get ahead of ourselves.

The outflow pipe had been fitted at exactly the right level in the big bund.

The final bund was being built. Here Ken was dumping some clay.

Later Dave started to dig out the clay bund between the basin and the lock.

May 25th 2016. Staveley Lower Basin was filled today.

May 26th 2016. Only one photo is needed today. The Work Party were aboard Madeline for the first ever trip through the lock.

May 28th 2016. The new John Varley II took a party of VIPs through the lock following the formal opening of the lock at our Festival.

June 8th 2016. There was a brief hiatus following the official opening of the lock at our Festival, but work had started again now. Hargreaves were there fettling the new gates.

The first balance beam quadrant was well under way. The raised bricks were to push against when opening or shutting the gate.

June 15th 2016. Staveley Lower Basin was no more, at least not for the time being. This means that work on this area and Hartington Harbour can resume.

The bund above the lock had been replaced, but this was no longer be a right of way because the tailbridge was open.

June 22nd 2016. Our volunteers had started installing the coping stones below the lock.

June 29th 2016. The remains of the old bridge had been dug out. Click here if you don’t know the story.

July 10th 2016. HS2 Ltd. had released maps showing that the work shown below is safe. The dotted line shown looping round the basin is the chord to their Infrastructure Maintenance Depot, which will be on the old Staveley Chemical Works site.
For more on this story, click here.

July 19th 2016. Our volunteers were removing more muck. The offside of the canal bed was about 2′ higher than the towpath side level. They were also going to extend the wall on the left. The outlet drain which comes from the Loop Road above, would be set into this new bit of wall.

The last eleven L-shaped retaners had been fitted and the blocks laid in front of them.

On the offside, the concrete footings had been poured to take the blockwork and brickwork to cover the ugly piling.

The spill weir had had metal edging fitted.

July 22nd 2016. There had been more excavations under Eckington Road Bridge. The red bricks are the remains of the old, three arched, Eckington Road Bridge.

This was the old Eckington Road Bridge looking east. The steel bridge in the background was the mineral line bridge. Staveley Town Lock was bult to get under this bridge, which is where the HS2 chord to their proposed Infrastructure Maintenance Depot was to run – see July 10th map above.

July 25th 2016. The steel mesh that would support the wall to hide the ugly steel piling under Eckington Road Bridge had been welded in place. There would be blockwork, then brickwork right up to the top. Concrete would be poured into the void behind.

August 2nd 2016. The extended bit of wall in Hartington Harbour had started to rise.

Pouring the concrete straight into the footings for the new 3m L-shaped reinforcers.

August 7th 2016. The view from Eckington Road Bridge. Note the wall on the left round the drain outlet. The two 3m L-shaped reinforcers were about to be fitted.

Two of the big reinforcers had already been fitted.

The wall to hide the rusty steel pilings was taking shape and concrete was being poured behind it.

August 18th 2016. Another concrete pour. This time it was the footings for the next ten L-shaped retainers on the towpath side.

September 1st 2016. The reinforcers under Eckington Road Bridge on the towpath side had all been installed…..

….. as had those on the offside.

The blockwork against the ugly metal pilings was complete. The bricks, which will go up to the top, were ready to be laid.

September 25th 2016. Terry was finishing off the blockwork in the wall round the drain from the Loop Road. The gap was for the outflow. The space in front was for the brickwork – note the wall ties. There was a slight step down on the back row of blocks to allow for the flaunching behind the coping stones after they had been fitted.

The first row of blocks had been laid on the towpath side retainers and you could see the old towpath wall.

October 27th 2016. The outfall from the Loop Road drain was complete.

The manhole covered …..

….. this very neat arrangement which includes an interceptor to collect any muck that might get washed down.
(Photo by Dave France taken on October 16th)

November 6th 2016. The brickwork covering the steel pilings was complete, the scaffolding had gone and it had been cleaned.

November 14th 2016. Another concrete pour.

December 1st 2016. There were some muck carrying wagons on site, because the latest incarnation of Mount Staveley was being moved by Fitzwise.

Here you can see Mount Staveley being loaded.

It was dumped in the corner just west of Hall Lane. An AECOM ecologist has provided confirmation that there was nothing of ecological interest to save or protect here.

January 8th 2017. Some more coping stones were in place on the towpath side below the lock.

Mick and Adrian were block laying below Eckington Road Bridge.

This was a reminder to put in wall ties on every third, sixth and ninth layer of blocks. Wall ties are the little wires that are put in the mortar sticking out of the back. When the concrete was poured between the blocks and the L-shaped retainers, they held everything in place.

9th March 2017. Dave France and Ralph O’Gorman were doing some bricklaying on the side weir. To find out more about this, see February 13th 2016 above.

They were building brick pillars with grooves. These grooves would take stop planks so that the level of water can be controlled. The water would spill over the top of the stop planks and drain back into the River Rother because this is the lowest point of this section of the canal.

Dave Kiddy was making the holes to affix the penstock valve, which would be at the bottom of the weir and would be opened if the whole section has to be drained. See May 20th 2016 above.

March 23rd 2017. A nice day and another concrete pour was due. This time it was to put the surface on the path across the top of the spill weir. Note that the concrete piers containing the slots for the stop planks were done and the penstock valve was in place. Note also that there were paving slabs in place under the stop plank slots.

Finally the concrete arrived. It was far too muddy for the wagon to get down into the cut, so it poured the concrete into Rex (the dumper) which transported it for Denis (the digger) to shovel out and put in place. Ralph and Bromley raked it flat, whilst Graham and Stewart scraped out the bucket.

Bromley and Graham then started screeding, whilst Ralph levelled any lumps or dips. Screeding means using a big board as a saw to get the concrete level.

They then went back to tamp it. This means lifting the board up and down to great a slightly rough surface. This is essential to ensure some grip.

April 9th 2017. A glorious day and lots had been done in the last couple of weeks. The concrete on the spill weir bridge had dried and temporary fencing erected.

The backs of two of the run off channels had been concreted.

The towpath just below the lock was being laid. Note the weed suppressing fabric.

Coping stones were being put in place over the bywash outlet.

April 23rd 2017. Mike Patterson had brought his drone to the site. You can see his film by clicking here. The relevant bits are between 2:30 and 5:00.
The screenshot above, looking west, showed what has been done so far. Staveley Town Basin is at the top left with the Mill Green Link beyond. The kink in the railings beside the disused mineral line, lower centre right, marks the bridge under which the canal will pass. We still awaited the licence from Network Rail to dig out the old bridge.

This screenshot is looking east. The canal route follows the path up the centre. The line of shrubbery leading off to the top centre left is Staveley Puddlebank. The site for our archaeological dig this summer, Bellhouse Basin, is the small field top dead centre, just before the puddlebank.
 The quadrant by the top lock gate had been done. (Photo by Dave France)

The brickwork return slope under Eckington Road Bridge had been completed. It was looking very clean because it had just been steam pressure washed.
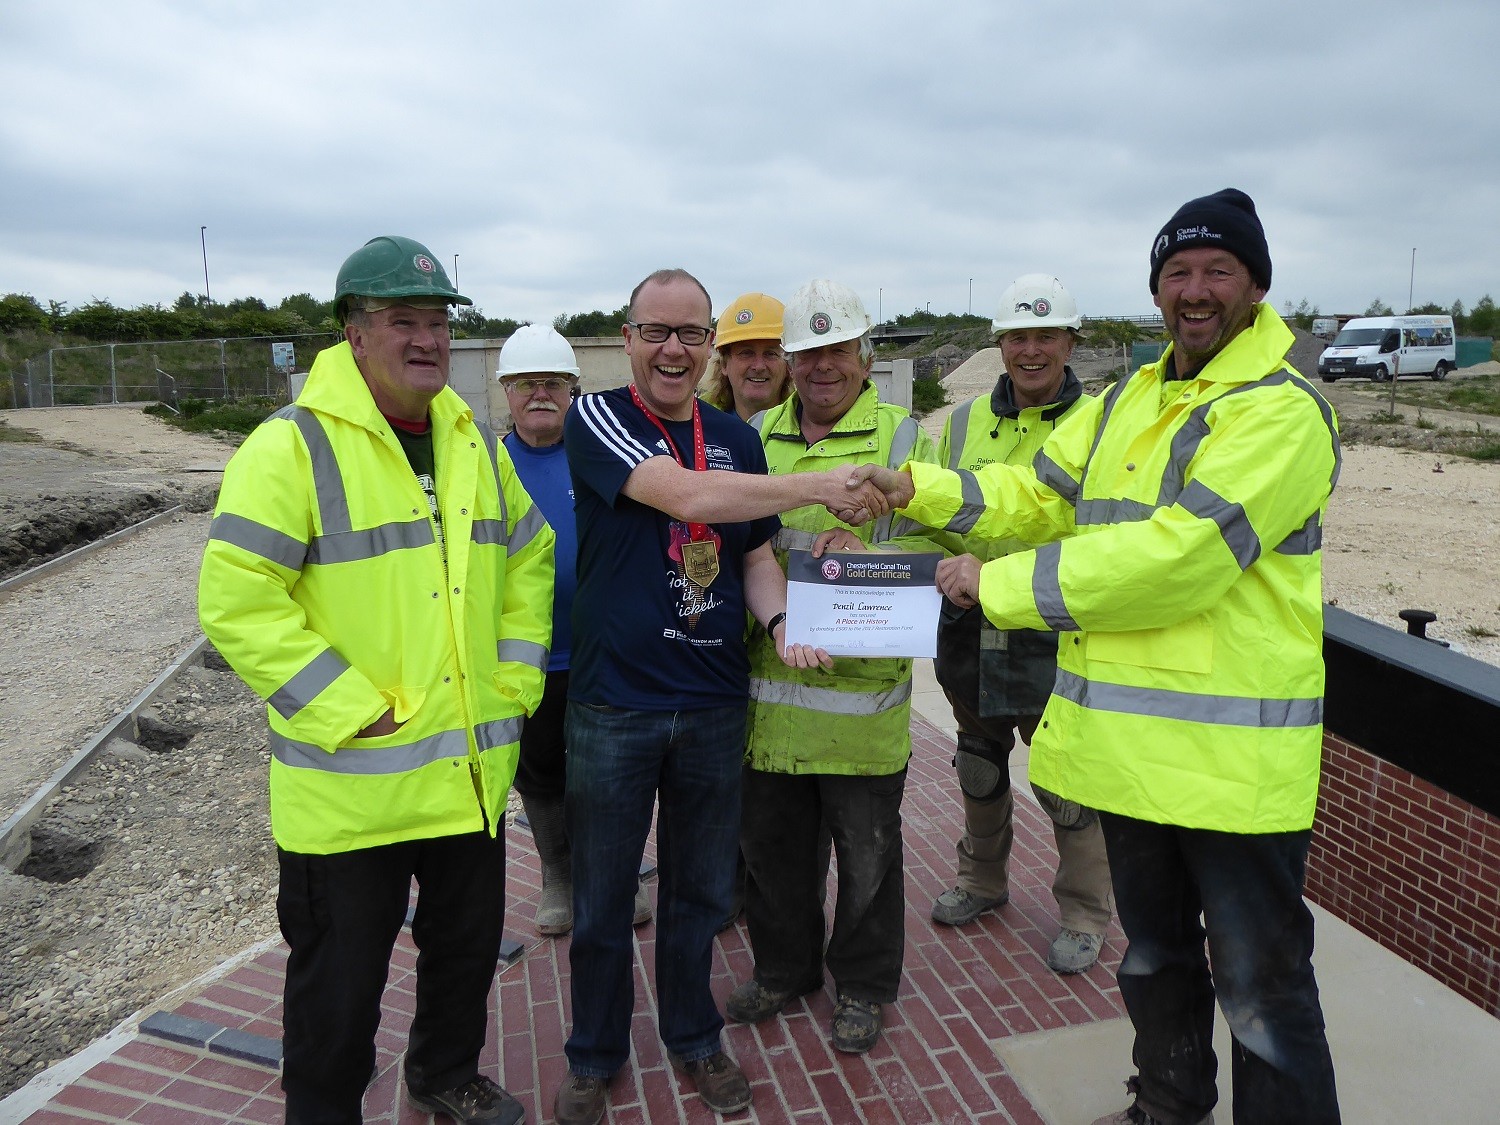
May 6th 2017. Denzil Lawrence came to the lock. He ran the London Marathon in aid of our Restoration Fund and had raised £1,100. Here he was being presented with his Place in History certificate. Note that he was wearing his medal. Left to right the photo shows Terry Berridge, Adrian Sturgess, Denzil Lawrence, Mick Hodgetts, Dave Kiddy, Ralph O’Gorman and Dave France.
Note the edging for the towpath on the left, currently under construction. The holes are for the knee rail posts.

May 12th 2017. The knee rails had been painted and the straps (metal plates over the joins) had been installed. (Photo by Dave France)

May 14th 2017. The posts for the knee rails had brick surrounds.

There is a brick surround to the land drain inspection cover.

May 25th 2017. The coping stones around the bywash intake had been laid.

You may notice the irregularity at the top left. This is because the contractors who cast the original concrete chamber (see October 22nd 2015 below) did it 4″ off square. As you would expect, our volunteers had fitted the coping stones exactly square. Note the grooves for the stop planks.

The last section of brickwork by the steps had been done.

June 25th 2017. Coping stones were being fitted in Hartington Harbour.

The next section past Eckington Road Bridge had been dug out and the concrete footings had been poured. Blocks were being laid. You will notice that L-shaped retainers had not been fitted. This is because the old canal wall was solid.

This wall was constructed when the railway was built in the 1890s, see the map near the top of the page.
“Tie 2/4/6/9” meant that wall ties are to be inserted after 2, 4, 6 and 9 rows of blocks. These would bind into the concrete that wiould be poured between the blocks and the wall at a later date.

July 9th 2017. Adrian and Bromley were digging out the chippings behind the offside wall. This was because the land drain had not been laid properly. After clearing, a layer of 4″ blocks will be installed and the drain put on top of them. This was to lift it to the level of the outlet at the lower centre of the photo.

Terry was laying blocks for the new bit of offside wall where it would go into the bank.

July 16th 2017. Pete, Adrian, Terry and John were laying the next layer of blocks on the off bank.

August 3rd 2017. The gap in the off bank in Hartington Harbour had been filled with clay. Coping stones still had to be fitted.

The coping stones on the spill weir had been fitted. The slots were for the weir boards which dictate the water level.

Dave and Pete were fitting more coping stones.

August 13th 2017. All the coping stones on the towpath side at Hartington Harbour were in position.

September 19th 2017. The last quadrant had been bricked. It would be finished when the stone was in place. The screeding on the towpath (right) side had been done ready for the final path finish.

October 1st 2017. At last, the great day had come. We finally had the licence from Network Rail to investigate the mineral line bridge.

The edge of the north abutment was in excellent condition.

October 4th 2017. Third day of digging and lots more had been cleared. This was the original towpath. It had been built up with clay and coping stones, now removed. Presumably this was to counteract changes in water levels due to subsidence. It explains why people talk about having to duck down when walking under the bridge. See old photo further down.

This was the north west portal. You can see the very oblique angle at which the railway crossed the canal.

This was the south west portal.

On the above A is the north west portal, B is the south west portal, C is the north east portal and D is where the ballast has been stored. The south east portal had not yet been cleared.

October 5th 2017. Lots more spoil had been removed. The towpath was on the left, with the edge marked by coping stones. The canal itself would be dug out last. On the right was the south east portal.

October 8th 2017. The Work Party had got down to canal bed level. The good news was that apparently it was almost exactly the same as the bed level in Hartington Harbour.

Apparently the cut off stubs of beams on the left had once supported a platform.

There were lots of railway sleepers, still fitted with chairs (rail supports), that were neatly lined up along the bed. This must have been some sort of early roadway because they were sitting on the clay, not a layer of subsequent silt. Maybe it was used during the construction of the second bridge, see below.

The first bridge, at the back,had horizontal sides. The second bridge had curved sides. It was added later when a second track was laid.The pipe at the end was to pump out the water that was trickling in at a steady rate.

October 12th 2017. Only one photo today, but click here for the exciting events of the day.

November 16th 2017. The resin bonded material next to the lock was put down today.

Some engineers from HS2 met us with a Derbyshire County Council engineer at the site along with an officer from Chesterfield Borough Council, to discuss how we could get this excavation to progress.

November 18th 2017. The resin bonded material beside the lock had been finished. This had not been painted on. It is white resin bonded material, but had to be done after the red. In the photo above, the letters are MDF to hold the spaces before applying the white.

November 24th 2017. This is Michael Warsop who incredibly kindly donated the money to buy our new (well new to us!) telehandler. (Yes, I know it says Teleporter, but this isn’t Star Trek!) It was to be called Sandy because it is a Sanderson T2-6-22.

Meanwhile, Tom Ingall and Edward Young had come to do some filming for BBC Look North. To see it, click here.

November 26th 2017. This was a display of all our major plant. Right to left: Rex (9 tonne dumper), Sandy (telehandler), Ben (6 tonne dumper), Violet May (6 tonne digger), Denis (16 tonne digger), Sleaford (¾ tonne dumper), TD – Tangerine Dream (6 tonne dumper) plus Terry and his faithful barrow! (Photo by Dave France)

December 17th 2017. Our volunteers were moving the towpath so that they could continue with the walling.

December 21st 2017. Some more work had been done to grade the new slope.

January 7th 2018. The footbridge had been temporarily closed in order to dig and put in a bit more wall. The section on the left will eventually join up with the bridge. The section on the right will eventually go to roughly the Heras fencing. There it will stop and there will be a natural bank to the bridge.

February 22nd 2018. The offside quadrant had been finished.

The other coping stones under the tailbridge had been fitted. The gap is for an expansion joint. It will eventually be filled with mastic.
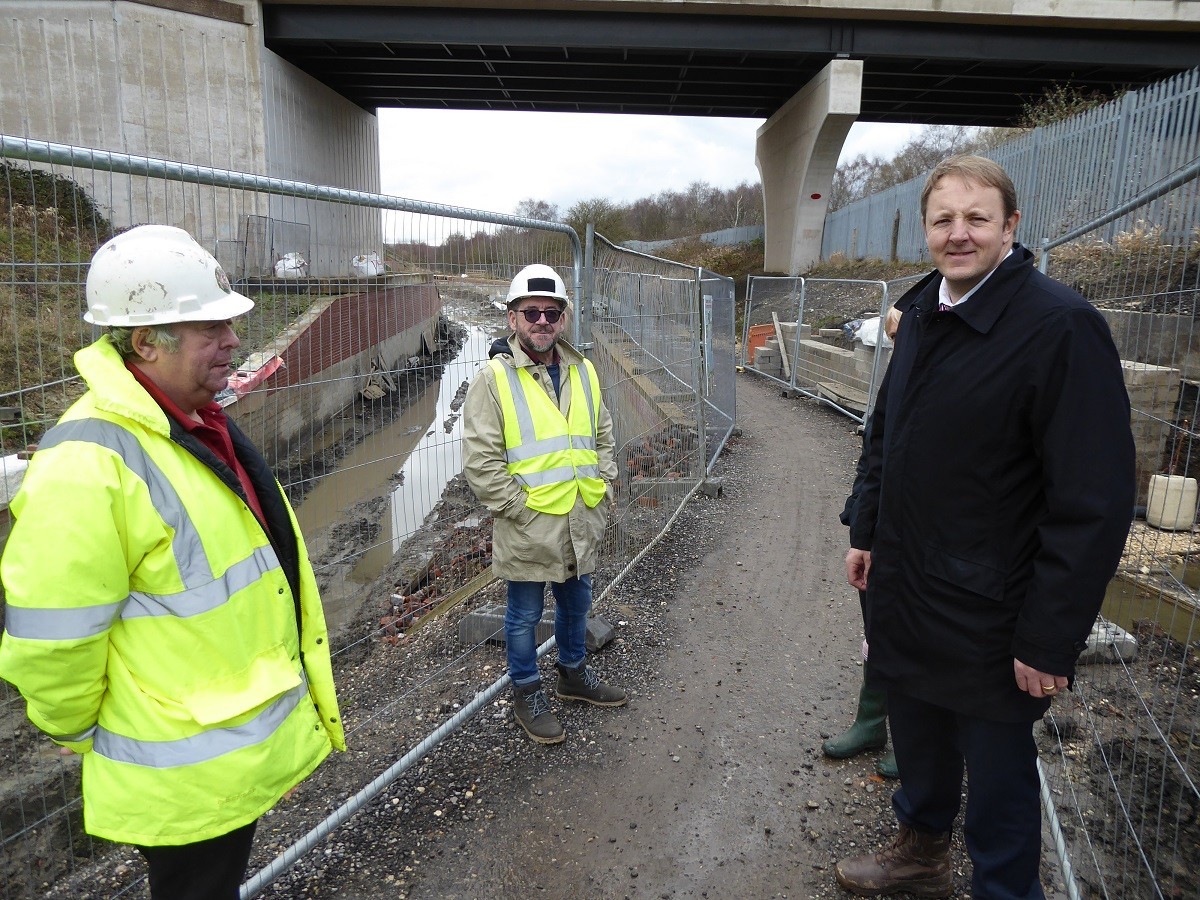
March 16th 2018. Toby Perkins, MP for Chesterfield, came to visit the site today.

March 29th 2018. Bromley, Dave, Fred and Roy were spreading aggregate on top of a land drain they had just laid.

This photo shows almost every stage in the construction. You can’t see the foundations, they were poured on November 14th 2016, see above. To the immediate right of the drain pipe, you can see the top of the L-shaped retainer. To the right of that is the block wall, topped by bricks. The gap between the retainer and the wall was filled with concrete. The coping stones were put on top and backed by mortar (the grey bit) – this is called flaunching. Today the drain was installed, topped by aggregate, the membrane and the topsoil.

March 25th 2018. We had at last been able to name the two pieces of machinery bought with donations at the end of last year; see November 24th above. Ever since then it had been too wet, too cold or too snowy for the wording to stick. Violet May was the 6 tonne digger. (Photo by Dave France)

Sandy was the telehandler. (Photo by Dave France)

April 16th 2018. Some turf had been laid next to the lock.

Meanwhile, the new railings were being fitted by ECS Engineering Services. 

They also brought the railings for the spill weir.

April 20th 2018. had virtually finished fitting the metalwork.

This is the bywash intake.

The railings below the lock were almost ready.

The grille was on the bywash outlet.

Dave had started the brickwork on the other tailbridge wingwall.

The railings across the spill weir were in place.

The covers for the spill weir were in place …..

….. on both sides.

On the spill weir, there is a gate to get at the penstock valve.

May 5th 2018. Dave had put in the first stone stripe on the bridge abutment walls.

May 10th 2018. The volunteers were preparing for a concrete pour. This was for the foundations for the next bit of wall leading up to the mineral line bridge.

The concrete was poured into the dumpers. The concrete was to be laid at the bottom of the steps, top left.

Dave was in Violet May, scooping the concrete out.

He then dumped it in the footings, for Roy and Pete to rake out.

You may have noticed some stakes with yellow tops. These were carefully placed to get the depth of concrete correct.

This boundary stone has been installed at Hartington Harbour. It was originally at Renishaw. It then spent nearly 30 years in Alan and Audrey Rowles’s garden. They kindly donated it to us. Eventually, it will be returned to its original spot in Renishaw.

May 20th 2018. Much work had been down laying down Ultitrek pathways.

The Trans-Pennine Trail had been lowered and widened.

June 5th 2018. The Trans-Pennine Trail has been diverted over the spill weir and a new bench has been installed.

Meanwhile, Dave had reached the second stone stripe on the bridge cladding. Terry helped him lifting the stones.

June 14th 2018. The second load of clay was delivered.

Denis was back. You can see some clay behind Denis ready to be firmed into the bottom of the wall on the right.

June 16th 2018. Dave and Paul were clearing the last of the muck away from the washwall foundations, ready for the clay.

June 18th 2018. The clay was being packed against the washwall footings.

June 22nd 2018. A small breach was dug in the bund ….. (Photo by Dave Kiddy)

….. and some water was let in to puddle the clay tomorrow. (Photo by Dave France)

June 23rd 2018. A larger cut was made in the bund. (Photo by Dave France)

Dave was wetting the clay.

June 24th 2018. Hartington Harbour was filling up fast, monitored by Mick. Dave had put in the second layer of stone cladding on the off lower wing wall of the tailbridge, helped by Ralph and Terry.

June 25th 2018. Hartington Harbour was full.

Dave was fitting new bollards below the lock. He drilled through the coping stones right into the concrete beneath and then used epoxy resin.
June 26th 2018. To see a drone video of the flooded Hartington Harbour made by Gray Wilson, click here. Thanks very much Gray.

June 28th 2018. The Work Party was on Madeline, the first boat into Hartington Harbour.

Click here for a video of them arriving.

July 3rd 2018. We had put up new information panels. To see this as a PDF, click here.

July 18th 2018. Mike Patterson had sent some aerial photos that he took just before and after our Festival. Above showed Hartington Harbour looking west.

This was looking east from the lock.

The lock again.

August 7th 2018. The boxes leading up to the bridge on the towpath side had been filled with aggregate.

September 21st 2018. The bund in front of the lock had been replaced.

October 11th 2018. There were now supporting bars across the lock to ensure that the Heras fencing did not collapse inwards.

The Work Party had been excavating right up to the mineral line bridge in order to put in some more L-shapes and wall. They will do the bit of wall that will meet up with the existing towpath wall beyond the current Trans Pennine Trail. They will then move the trail onto the new bit, build a new ramp to meet the existing trail beyond where the L-shapes are currently lying and then fill in the gap with the last of the L-shapes.
By the way, you might be interested to watch this video, produced by Chesterfield Borough Council, of a vision of the Staveley Corridor Regeneration Site. It starts at Dixon’s Lock and shows the St Gobain development, Chatsworth Estate’s new village, Hollingwood Hub, the new marina across the road from the Hub, the HS2 IMD and the proposed Talgo site, but the canal stops at Staveley Town Basin!

October 25th 2018. This concrete pour would be the foundation for the next set of L-shaped retainers, see October 11th above.The pumping was soon underway, you can see the concrete in the bottom left corner.

Malcolm was using the vibrator to release trapped air and Dave was tamping it level. Note the difference between the raw concrete at the far end and the finished article at this end.

November 2nd 2018. Ten of the L-shaped retainers have been installed on the new concrete pad (see October 25th above).

November 6th 2018. The first few rows of blocks were already in. (Photo by Dave France)

November 18th 2018. The guys were digging out the towpath next to the railway abutment walls by hand. The walls are standing on clay, so they will dig out below, in small sections, and then reinforce it with concrete.

December 30th 2018.The blocks were done and the gap concreted up, but there had been rather a lot of rain recently.

April 14th 2019. For the first time in months it had been dry enough to get back to Hartington Harbour. The plan was to fill the gap in the wall on the towpath side. To achieve this, the Trans-Pennine Trail would be moved a few metres to the right. You can see here that the ramp had been extended and reinforced with a pile of gabion bags. Note the pipe at the bottom right.

April 17th 2019. This photo shows where the new wall finishes (X). It just had to be connected to the section a bit further on, currently underwater.

April 18th 2019. The fence along one side of the soon-to-be-moved Trans-Pennine Trail was being erected.

April 21st 2019. Path edgings were done and preparations were being made to move the fence over.

25th April 2019. You can see that the TPT had been moved. You can see the top of the retaining wall centre left; note the crossed stakes.

May 10th 2019. The volunteers had dug out the section between the two bits of wall.

May 24th 2019. The preparation work for the spill weir overflow slab.

The bench next to the spill weir had had its seat installed.

June 6th 2019. A concrete pour had been booked for the spill weir outflow pad.

Then round to the other site – the foundations for the last set of L-shaped retainers on the towpath side.

What was left was then pumped into the gap between the blocks and the L-shaped retainers.

June 10th 2019. Yesterday the Work Party installed twelve L-shaped retainers on the new concrete pad to complete the wall.

July 7th 2019. The block wall was finished. (Photo by Dave France)

July 18th 2019. The guys were backfilling between the L-shaped retainers and the block wall. Note the wall ties in the gap. Denis was moving some sand bags onto the bank.

Bromley and Malcolm helped the concrete down the ramp.
Click here to see a video that Graham shot of all this taking place.

August 18th 2019. Dave was laying bricks dry using a spacer between each one.

August 22nd 2019. You can see the bricks that Dave laid last Sunday. Note the wall ties above which would hold it all together when the concrete was added between the L-shaped retainers and the wall.

October 14th 2019. The bricks had been laid.

As you would expect, the bricks had been melded into the original bridge abutments.

October 26th 2019. The plan had been to fit the coping stones tomorrow but there was another flood.

It flooded through the lock to Hartington Harbour and was pouring over the spill weir (Photo by Dave France) …..

November 3rd 2019. The guys had laid lots of coping stones last Thursday. They were now putting in the flaunching – the concrete backing behind the blocks.

November 24th 2019. All the equipment etc. had been cleared from the towpath and it was now almost at the right level.

January 5th 2020. The TPT had been diverted to cross the line of the canal. This was supported by lots of builders’ bags full of muck. There was another line of bags further on.

January 15th 2020. The new ramp was almost complete, but the top surface had to be added.

February 23rd 2020. The job today was to refit the last bits of security paling fence.

March 1st 2020. Some of our heroes were putting in the rest of the capping to the retaining wall. This was super hard granite mortar. It looked a bit rough, having been cast on Thursday, but Dave would finish it off smoothly.

March 16th 2020. Yesterday the guys put more aggregate down on the new Trans-Pennine Trail track.

April 20th. What frustration. The new path is ready. It could have been moved over and the new corner installed by now, were it not for the lockdown.

June 21st 2020. The Trust had had its Covid-19 Policy and Risk Assessments approved by Derbyshire County Council, so the Work Party had been back in action. The Trans-Pennine Trail was moved to the new path on the left a few days ago. The plan today was to excavate the corner of the wall on the offbank (right). This would be rounded off and there would be a soft bank from here to the bridge abutments.

June 28th 2020. Today the guys were digging out more of the canal channel.

July 5th 2020. Denis was working today, so the guys were digging out the canal where the previous line of the Trans-Pennine Trail had been (see above).

July 9th 2020. Dave was sculpting the bank. Photo by Graham Voss

July 13th 2020. Everything had now been dug out. You could see where the offbank wall would be curved round into the natural bank which will run up to the bridge abutments.

July 23rd 2020. A concrete pour was due for the footings where the offside wall would curve round into the natural bank.

Job done. It would just be a block wall with bricks at the top then coping stones. L-shaped retainers would not be needed.

29th July 2020. A workforce from Network Rail was on site today putting some palisade fencing round the disused footbridge. Note the section at the north end.

Our volunteers had started building the new bit of offside wall the day before. (Photo by George Rogers)

26th August 2020. The bricks had been added to the last section of wall. (Photo by George Rogers)

17th September 2020. Dave was driving a hired 32 ton digger today. He was finishing off the profiling to the east of Eckington Road Bridge.

Meanwhile, Dave was driving Denis sorting out the clay that was being delivered to Staveley Town Basin.

The clay came from excavations at Markham Vale.

24th September 2020. This is the clay that had been delivered from Markham Vale.

The clay was dumped by Graham …..

….. ready for Dave to spread it out.

29th September 2020. The clay was in the end section up to the Trans-Pennine Trail.

Hartington Harbour was almost finished.

October 2nd 2020. The guys had virtually finished clearing the muck from the section between the lock and the Loop Road Bridge.

Here the brown clay, used in 2018, is on the right. We had very little that was just packed round the edges – you can see the last remains on the left rear. Dave was putting this down as a base layer.

October 5th 2020. Graham brought a load of clay for Dave to spread.

Dave got to work puddling the clay in.

October 7th 2020. Yesterday the guys finished off the last bit of clay.

October 8th 2020. The torrential rain overnight had again flooded the site. Photo by Graham Voss

After pumping out, work started on the block wall, sealing up the access ramp. Dave was laying blocks aided by Adrian.

It was too muddy for the machinery, so they were transporting the gobbo (mortar) in buckets and blocks in barrows; just like the old days.

October 15th 2020. Today’s job was to build more of the wall sealing up the old access ramp. Dave was looking forward to doing the front blocks whilst Fred was doing the back rows.

October 19th 2020. Yesterday more blocks were laid. The rest of the front would be done in brick.

The back would be blocks. The gap was to build some escape steps in case people or animals fall into the water.

October 22nd 2020. Fred and Dave were again laying blocks.

These guys could only keep working because others mix the gobbo (mortar) for them. Here Roy demonstrated the finer points of the mixer motor to Graham, Bromley and Mick.

October 29th 2020. It was too wet to do any blocklaying, but you could see that much of the access ramp had been filled in at the weekend. Note the gap at the left side of the block wall. This would eventually be an outlet for the land drains.

The baffle plate was fitted to the bywash outlet. This would stop a major flow from pushing boats to the side as they emerge from the lock. The grill had had the bottom bar removed to stop it getting so clogged up. Note another land drain outlet to the right.

November 3rd 2020. Following the announcement of the next lockdown on 5th, the guys were getting as much done as possible. Dave was laying bricks whilst Malc was splitting bricks. These special bricks were extra hard in case they get bumped. Note the bits of metal sticking out of the blockwork. These were ties that hold the blocks and bricks together. Eventually there would be concrete poured into the gap between the brick facing and the blocks.

Note the big pipe which will be the outlet for a major land drain coming down from the compound which has a natural spring at this time of year. The smaller, square pipe on the left will be connected to the land drain running along the back of the wall.

December 6th 2020. Another foul day so bricklaying was not possible. Instead the guys finished this new fence.

December 10th 2020. At last, some bricklaying could be done today. The wall in front of the rescue steps was completed. The two breeze blocks were only there temporarily to hold the step 2 riser bricks in place.

December 20th 2020. Work continued on the spillweir walls.
January 21st 2021. Dave took the video below which demonstrates how well the deflector plate on the bywash outlet was working.

April 11th 2021. At last some proper work could be done post lockdown. This was how things were left on 30th December.

Dave was doing the pointing. Note the bull nosed stone.

April 16th 2021. The rescue steps had been finished.

April 18th 2021. The sign and the chain were installed today.

April 22nd 2021. Some topsoil had been put down.

May 9th 2021. Malc was doing the brickwork on the spillweir sidewall.

May 16th 2021. Malc, Paul and Walt were building the brick front of the west wall of the spillweir overflow.

May 30th 2021. With all the recent rain, the grass above the emergency steps had grown superbly.

The right side wall at the spillweir overflow had been capped.

Malc had made a superb job of the bend in the wall round the raised manhole.

June 6th 2021. The scaffolding was up to finish the cladding of the tailbridge and five courses had already been done. No work today because of the rain.

June 10th 2021. Dave, Fred and Martin were doing the bridge cladding.

Meanwhile Malc and Tom were finishing off the spill weir overflow side wall.

June 18th 2021. Some guys from ECS arrived early to put up some railings.
Note that the brick facing of the right hand side of the tailbridge wingwall had been completed.

By the end of the day, the railings round the bywash outlet and the rescue steps were in place.

July 18th 2021. The work on the side walls for the spill weir overflow was virtually finished.

August 8th 2021. The bridge number looked great.

The stone on the offiside was superb.

Note the birdsmouth bricks that filled in the bend on alternate rows.

August 29th 2021. The brickwork on the east side of the tailbridge had been fiinished. It now had to be cleaned up. There will be slabs in the foreground; a drain had already been installed.

The work at the spill weir had been finished and a new fence installed.

September 27th 2021. The scaffolding had been removed so that the brick cladding was revealed in all its glory.

Note the new bridge plaque. Soon all the bridges from Constitution Hill through to Eckington Road would have these.

October 10th 2021. The final coping stones on the offside wall before the mineral line bridge had been installed and the flaunching behind them completed.

October 14th 2021. The bund in front of the lock was removed today.

This was a general view. (Photo by Keith Bown)

Soon the forebay was looking pretty empty, but there was still lots of clay below water level.

October 17th 2021. The bund had been completely cleared.

October 28th 2021. The remaining coping stones had been added.

Preparations were being made to start cladding the top side of the tailbridge.
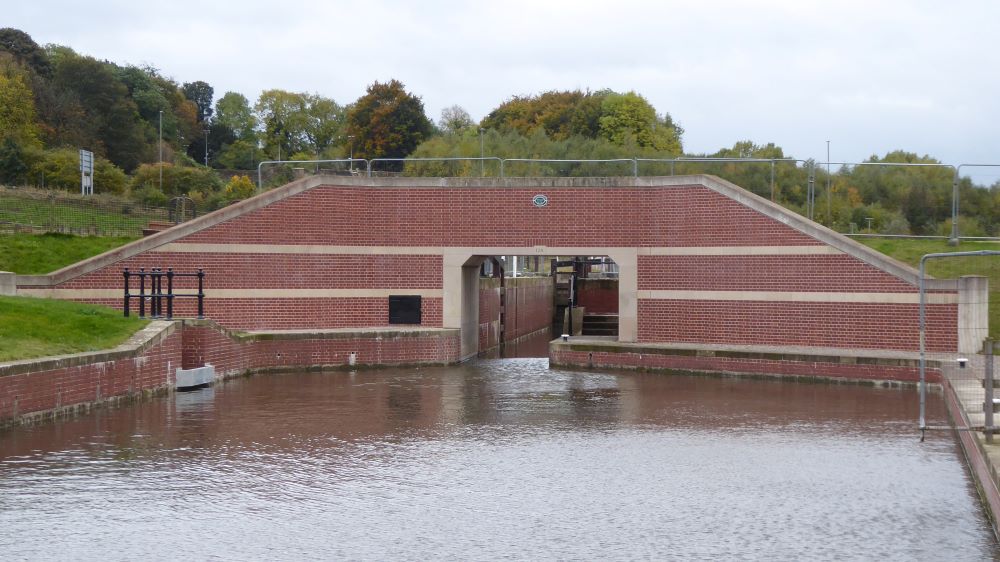
With water in the lower pound, the bottom side was looking great.

November 18th 2021. The cladding of the west side of the tailbridge had started.

December 2nd 2021. Work continued on cladding the west side of the tailbridge. The next layer would be stone.

The bricks were joined to the wall by ties. Sometimes these were screwed into the wall …..

….. and sometimes they fitted into the ready made slots.

December 9th 2021. The first layer of stone had been laid.

The lintel was in place.

Resting on top you could see one of the bird’s mouth bricks. Further down you could see how they were used for the corners.

December 30th 2021. The first decent weather for a while meant that more bricks could be laid. You could see a stack in the front which had recently arrived. They were a slightly different shade, so they had to be mixed up with the others.

Note the bricks on the top course. They have had a central section cut out. This is to give the effect of a row of headers without having to cut lots of bricks in half.

January 2nd 2022. The method of creating the look of the course of headers by cutting grooves in the bricks was shown above. This is the jig that Colin created to cut the grooves.

He made the first cut …..

….. then the second. Note that the difference was the white spacer. On this photo it was lying on the right of the jig. On the photo above it was round the block on the left.

Finally, he chopped out the middle bit.

January 13th 2021. A lovely sunny day and Malc was again laying bricks (not too many more courses needed).

This was the right hand end. The brickwork would be cleaned up when the bricklaying was finished.

Meanwhile, Martin was doing exactly the same on the left side.

January 20th 2022. The right hand section was finished except for cleaning. The strange colour is sand which is stage one of the cleaning process.

January 23rd 2022. The left side was finished.

One of the pieces of stone resting on the lintel was being fixed. It was stuck to the lintel with industrial strength mastic. Note how it hung over the lintel.

January 30th 2022. Malc was laying the second course of bricks on the centre section.

Meanwhile, Andy was squeezing mortar into the gaps between the stonework. This would later be pointed neatly.

February 10th. Lots of work had been done on the centre section. Some cleaning had been done on the side walls. Our ever resourceful volunteers had even erected a cover for proection from inclement weather.

February 17th 2022. Martin and Malc were bricklaying again.

March 6th 2022. The last three courses were almost complete.

Malc finished off the pointing with a pointing iron.

March 22nd 2022. The bridge was finished.

This meant the public could use the steps for the first time.

The name plate had been fixed.

April 3rd 2022. All the fencing between the canal and the towpath at Hartington Harbour was removed today.

June 9th 2022. The fencing to the east side of the tailbridge was complete, so all the Heras fencing had gone.

The gate had just been fitted. This was the very last piece of work.

This was the view from the west. All that remained was for the compound to be removed.